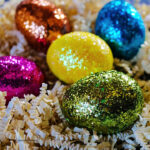
Glitter Easter Eggs
How to make DIY glitter easter eggs for decorating. These glitter and mod podge easter eggs are super easy to make and kids will love this craft. Also we have an alternative to make these glitter eggs edible.
Cost $10
Equipment
- Plastic Cups one cup for each color of glitter used
- Brushes
Ingredients
- White hard-boiled eggs
- Acrylic paint same colors as glitter
- Glitter same colors as paint
- ModPodge or White Elmer’s Glue
Instructions
- Make sure you are starting with dry, hard boiled eggs that are cooled completely. Setup your paints with coordinating glitter colors. (ie: blue paint with blue glitter). Paint your eggs making sure the eggs are fully covered with paint.
- Allow your painted Easter Eggs to dry completely. Then place each color of glitter in a separate plastic cup. Use a paint brush apply a nice thick coat of ModPodge (or glue, if using) completely covering an egg.
- Put your egg into the plastic cup with the corresponding color of glitter. Then gently shake the cup around to evenly coat your egg. Repeat with all the other eggs.
- Allow the glitter eggs to dry for an hour. Now you can use them for all your Easter activities and Decorating (if using fake eggs).
For DIY Edible Glitter Eggs. Paint the eggs with the Bakers Edible Glue and sprinkle with Edible Glitter.
Notes
NOTE: Remember if boiled eggs are left out of the refrigerator for more than 2 hours then should not be eaten. But if they are refrigerated they can last up to 7 days per the USDA.