
Framed Doily Art Project
I have always loved decorating with old handmade pieces, especially the everyday things created by women for their homes and families. This framed doily art lets me display those delicate pieces where I can enjoy them instead of leaving them folded away in a drawer.
It is also one of the simplest wall art projects I have made. All you need is a frame, a piece of fabric, and one or more vintage doilies, and the whole project takes about 30 minutes.
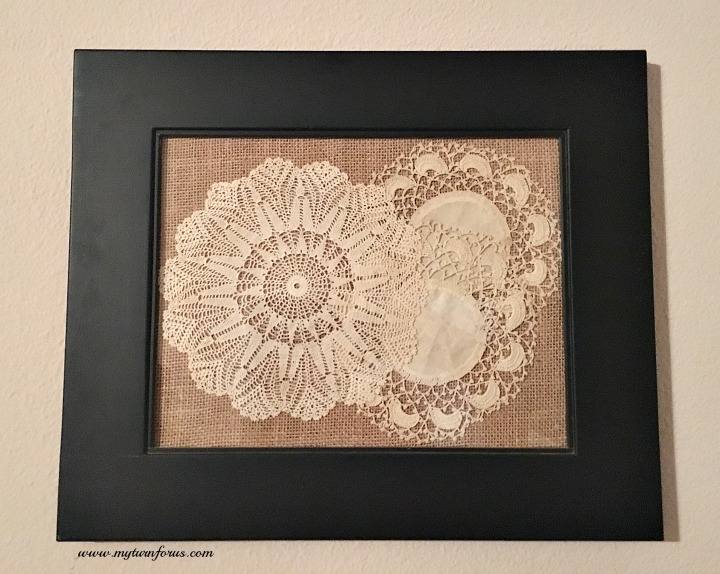
Giving Old Doilies a Special Place
Some of my favorite things to display are not expensive antiques or paintings by famous artists. They are the ordinary handmade pieces that remind us of another time.
This post contains affiliate links, which means if you make a purchase, we might receive a small commission at no additional cost to you. Please read our Disclosure Policy.
There was a day when many women knew how to crochet these delicate doilies. My mother told me that my grandmother even used thread saved from flour sacks. Her generation did not throw away much of anything if it could be put to another use.
I have several little doilies that my grandmother made, and I am still amazed by the tiny stitches and the amount of time it must have taken to finish each one. The work is so delicate, yet many of these pieces have survived for decades.
Whenever I visit an antique store, I keep an eye out for old doilies. I can often find them for less than five dollars, which always feels a little sad considering how much work went into them. Of course, five dollars would have been a much larger amount in my grandmother’s day.
When I look at these doilies, I imagine someone sitting in a parlor or out on the porch, working one small stitch at a time as the crochet hook flashed in the light. Framing them allows me to see and appreciate that work every day.
Artwork should bring you pleasure, no matter what form it takes. To me, that is what decorating a home is all about.
Why I Like This Project and I think You Will Too
This is the kind of project I enjoy because it is meaningful, inexpensive, and easy to change when I want a different look.
- It gives vintage or family doilies a safe place to be displayed.
- The frame protects them from dust and handling.
- No glue or permanent attachment is needed.
- You can complete the project in about 30 minutes.
- The fabric can be coordinated with the colors already in your room.
- It works with one large doily or a small collection.
Supplies Needed
Vintage Doilies or handmade ones. I used several small vintage doilies because I like the look of items grouped in threes. You can use one large doily, several small ones, or a family piece that has been tucked away for years. Antique shops, flea markets, estate sales, and thrift stores are all good places to look. Before buying one, I check for large stains, tears, or areas where the crochet is beginning to unravel.
Picture Frame with Glass. I prefer a frame with a fairly wide border because it gives the doilies enough breathing room and makes the finished piece look more substantial. The frame does not need to be expensive. An old frame can be cleaned, painted, or lightly distressed to work with your home.
Burlap or Fabric. I used burlap because I like its texture against the delicate crochet. The rougher background makes the stitching easier to see. Cotton, linen, ticking fabric, or even decorative paper can also be used. I would choose something fairly plain so the background does not compete with the doilies.
How to Make Easy Doily Wall Art:
This was an easy project that could be done in 30 minutes or less. The printable How-To Card is below, but I have broken the project down here so you can see exactly how I arrange and frame the doilies.
Step 1: Prepare the Frame
Place the frame face down on a clean work surface and remove the backing.
Clean both sides of the glass before you begin. Once everything is closed inside the frame, you do not want to notice a fingerprint or speck of dust right in the middle.
Step 2: Cut the Background Fabric
Use the frame glass or backing as a guide and cut a piece of burlap or fabric slightly larger than the opening.
It does not need to be perfectly cut because the edges will be hidden behind the frame backing. I also do not hem the fabric. Since it will be enclosed inside the frame, a little fraying will not show.
Step 3: Arrange the Doilies
With the frame still face down, place the doilies against the inside of the glass.
Take a moment to try a few different arrangements. I like to leave a little open space around each doily so the details are easier to see.
If you are using three doilies, they do not need to be placed in a perfectly straight row. A slightly uneven arrangement often looks softer and more natural.
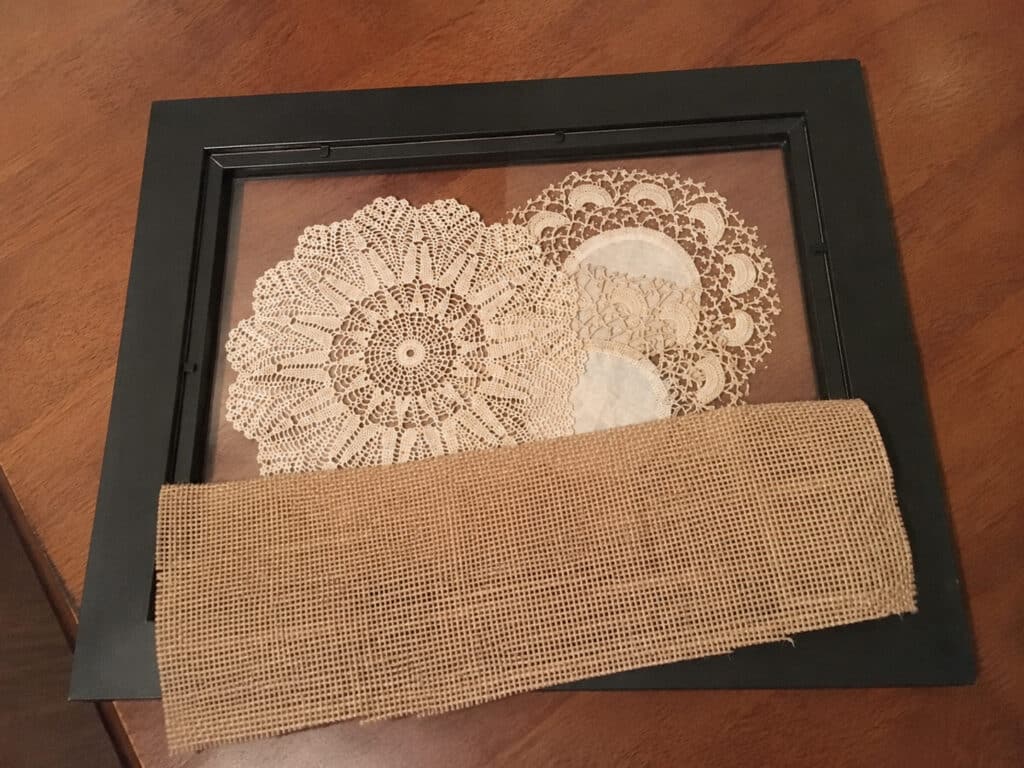
Step 4: Add the Fabric
Carefully lay the fabric over the backs of the doilies.
Keep one hand on the fabric as you position the frame backing so the doilies do not shift. This is the only part that can be a little fiddly, but there is no need to rush it.
Step 5: Replace the Frame Back
Put the backing into the frame and secure it in place.
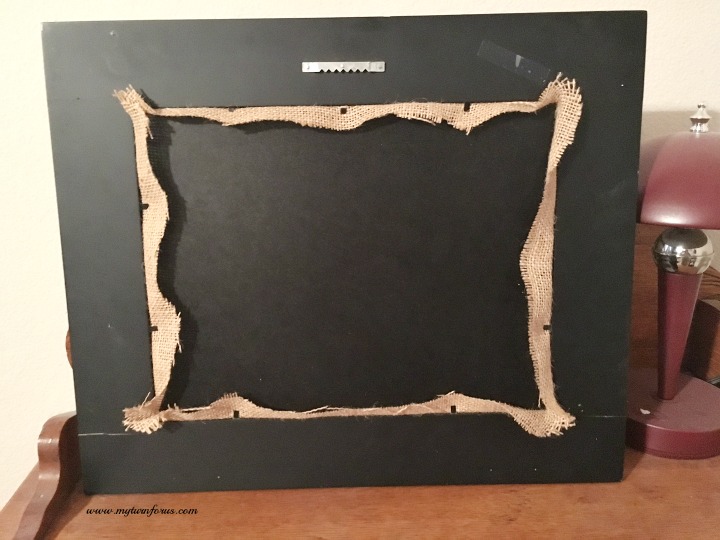
I did not glue, tape, or sew the doilies to the fabric. The frame backing holds everything tightly enough to keep them in place.
Turn the frame over and check the arrangement. If one has moved, simply open the frame and adjust it.
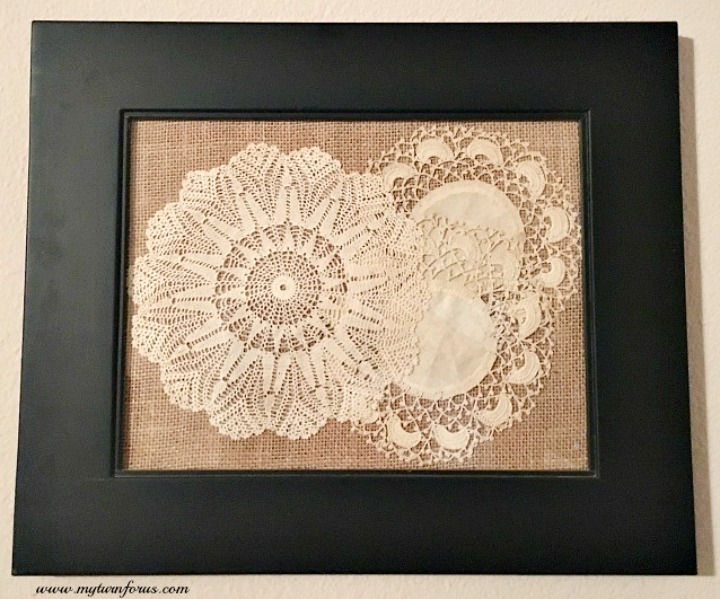
Expert Tips
This project is very forgiving, but a few small details will make the finished piece look more polished.
- Press the doilies first if needed. Use low heat and place a pressing cloth between the iron and the crochet.
- Do not stretch the doilies. Let them keep their natural shape instead of pulling them flat.
- Keep the background simple. A busy print can hide the delicate crochet work.
- Clean the glass before assembling the frame. This saves you from taking everything apart again.
- Avoid permanent glue on family pieces. Pressure from the backing is usually enough to hold them.
- Keep valuable textiles out of direct sunlight. Strong sunlight can fade fabric and weaken old fibers over time.
The most important tip: I would not glue an heirloom doily to the background. Framing it without adhesive allows you to remove it later without damaging the stitches.
Ways to Change the Look
I like the contrast of white doilies against natural burlap, but there are several easy ways to make the project fit your home.
- Use dark linen behind a white or cream doily for stronger contrast.
- Choose ticking stripe or small-check fabric for a farmhouse look.
- Paint an old frame to match the furniture or trim in the room.
- Frame one large doily instead of several small ones.
- Create a small grouping of matching frames using different doilies.
You could also display the same type of crochet pieces in embroidery hoops. My Vintage Crochet Doilies on Embroidery Hoops Wall Collage is another simple way to enjoy them without hiding their details.
Frequently Asked Questions
They should stay in place if the frame backing fits tightly. The pressure between the glass, fabric, and backing holds them securely. If your frame has extra space inside, add a thin piece of cardboard behind the fabric to create a snugger fit.
Only wash it if you know the fibers are strong enough. Very old thread may be fragile, and stains do not always come out safely. When in doubt, gently dust the doily and leave the deeper cleaning to someone experienced with antique textiles.
You can, but the glass protects it from dust, moisture, and handling. I prefer using glass, especially when the doily has sentimental value.
A frame with a wide border and a firm backing works well. A shadow box can also be used, but it is not necessary unless the crochet is especially thick or you want more space between the textile and the glass.
Yes. Heavy scrapbook paper, handmade paper, or cardstock can work well. Choose a color and pattern that allow the stitching to remain the main focus.
More Easy DIY Home Decor
If you enjoy giving old or ordinary pieces a new purpose, you may also like my Faux Granite Designer Bottles, How to weave Hemp Bottom Chair, and these Rope Crafts and Projects. They all use simple materials to create useful decor with plenty of character.
I hope this framed doily art encourages you to pull out a handmade piece that deserves to be seen. If you make your own, I would love to hear whose doilies you used and where you displayed them. Leave a comment below, share your project on Facebook and tag me, and please leave a star rating if you found the tutorial helpful. It helps more friends find these simple projects too.

Tools
- Fabric scissors
- Iron and pressing cloth, *optional
- Glass cleaner
- Soft lint-free cloth
Supplies
Instructions
- Place the picture frame face down on a clean work surface and remove the backing.
- Clean both sides of the glass and dry it with a lint-free cloth.
- Use the frame glass or backing as a guide and cut the burlap or fabric slightly larger than the frame opening.
- Press the fabric and doilies on low heat if needed. Use a pressing cloth to protect delicate crochet.
- Place the doilies face down against the inside of the glass.
- Arrange the doilies until the spacing looks balanced, leaving a little open area around each one.
- Carefully lay the fabric over the backs of the doilies without shifting the arrangement.
- Replace the frame backing and secure it firmly.
- Turn the frame over and check the placement. Open the frame and adjust the doilies if necessary.
- Hang or display the finished framed doily art away from direct sunlight.
Notes
- Do not glue heirloom or antique doilies to the fabric. The pressure from a snug frame backing should hold them in place.
- If the contents move inside the frame, place a thin piece of cardboard behind the fabric before replacing the backing.
- A plain fabric background makes the crochet details easier to see.
Keep older textiles away from direct sunlight and damp areas. - The fabric edges do not need to be hemmed because they will be hidden inside the frame.
Click HERE to save this Doily Wall Art project to Pinterest