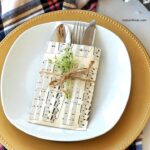
DIY Sheet Music Place Setting Pouch
Turn your holiday table into a vintage masterpiece with this DIY Sheet Music Place Setting Pouch. In just 20 minutes, fold old song sheets into elegant cutlery holders—perfect for Christmas, Easter, or a 1950s rock ‘n’ roll bash. Tie with jute, tuck in a sprig of green, and watch your guests swoon over the personalized charm. Crafty, cheap, and downright classy.
Cost $5
Equipment
- clear invisible tape
Ingredients
- Sheet Music 9 X 12
- Jute twine or ribbon
- Greenery of choice
- Themed Charm optional
- Place name cards with hole optional
Instructions
- Cut and remove one page of sheet music from the sheet music book and lay on a flat surface. Place it sideways with your choice of music up and the cut side to the top away from you.
- Fold over the cut side of the page about 1 inch and crease it well. This will become the little fold at the top of your cutlery pouch upon completion.
- Flip the sheet music over with the fold side down but to the top. Fold your paper into thirds and crease, then unfold.
- Refold the left third inward and then fold about ½ to 1 inch of the bottom up making the bottom of your pouch. Use the clear tape and tape the bottom fold up leaving the third side on your right still flat or open for now.
- Now fold the third or the right side in and carefully tape it to secure it and then flip the pouch over. This will be the front of your music paper cutlery pouch.
- Wrap the sheet music pouch in twine, jute or ribbon of your choice and tie it with a bow.
- Then you can add some greenery or flowers for the final touch. Or any little charms if you are having a themed party or a children’s party.
- Slide your silverware and a napkin inside the sheet music pouch and place on your table setting.