DIY Olla Watering System Using a Terra Cotta Pot
This DIY olla watering system is an inexpensive way to give garden plants a slow, steady supply of water. I made my homemade olla from a simple unglazed terra cotta pot, and the hands-on work takes about 10 minutes before the putty needs time to set.
Living in a dry Texas climate has taught us to pay close attention to how we use water around the ranch. Our vegetable garden can dry out quickly during the hottest part of summer, so I am always glad to find a simple garden project that saves water and makes one less chore for us.

Let’s Define Olla In This Context First
An olla, pronounced oy-yah, is an unglazed clay vessel that is buried in the soil and filled with water. The porous clay slowly releases moisture into the surrounding soil as it begins to dry.
This post contains affiliate links, which means if you make a purchase, we might receive a small commission at no additional cost to you. Please read our Disclosure Policy.
When the soil is already moist from rain or recent watering, less water moves through the sides of the pot. This gives the roots a more consistent source of moisture without pouring water over the surface of the garden every day.
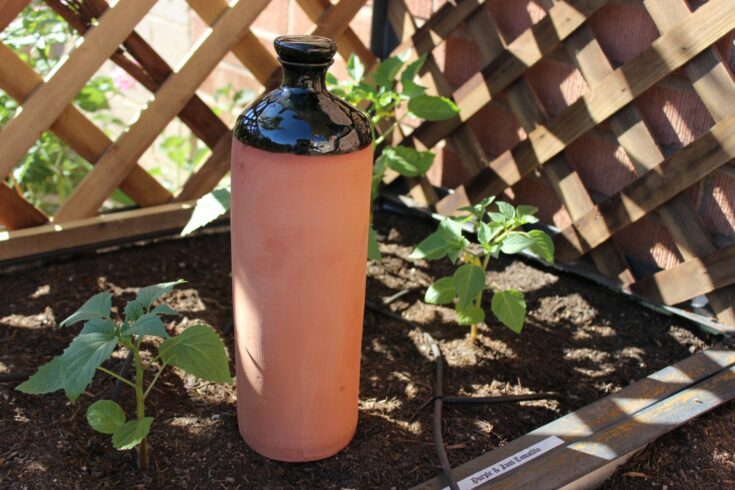
Traditional garden ollas usually have a rounded body and narrow neck. They are beautiful and useful, but they can also be expensive. I have found that a plain terra cotta flowerpot works well for a small homemade version.

Why I Love This Homemade Olla
This is the kind of garden project I enjoy because it is useful, inexpensive, and does not take all afternoon to make.
- The active work takes about 10 minutes.
- It uses an inexpensive terra cotta flowerpot.
- Water is delivered below the soil surface where the roots can reach it.
- Less water is lost to surface runoff and evaporation.
- The saucer keeps dirt, insects, and debris out of the pot.
- You can make several ollas at one time for different areas of the garden.
Our little homemade ollas may not be as pretty as the ones sold in garden shops, but they have been useful around our garden. Around here, I like things that work even if they are not fancy.
Supplies Needed:
You only need a few supplies for this project.
Unglazed terra cotta pot: I used a pot about 6 inches wide. It must be unglazed so water can slowly pass through the sides.
Terra cotta saucer: Choose one large enough to cover the opening of the pot. The saucer reduces evaporation and keeps insects and soil out of the water.
Blue Tack Putty: I use this to seal the drainage hole. One package was enough for about six of my small ollas.
Parchment or wax paper: This protects the work surface while you press and shape the putty.

How to Make a DIY Olla
The complete printable directions are in the how-to card below, but here is how I prepare each pot before placing it in the garden.
Step 1: Prepare the Terra Cotta Pot
Remove the stickers and price tags from the flowerpot. Wipe away any loose dirt or dust, especially around the drainage hole.
Cover your work surface with parchment or wax paper. I like to do this because the putty is easier to handle and does not stick to the table.
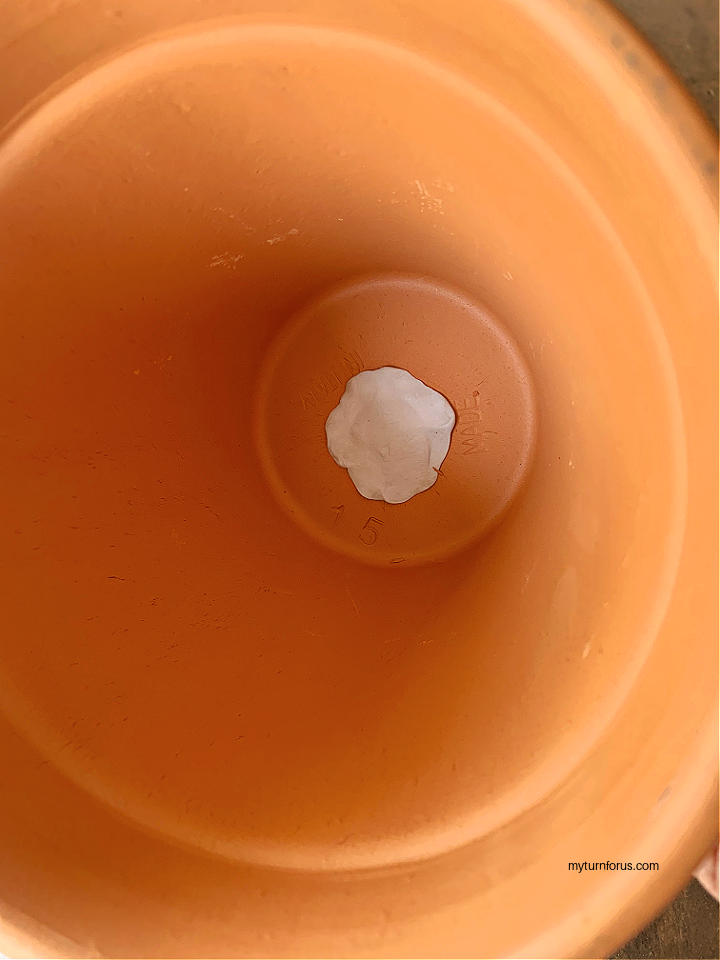
Step 2: Seal the Hole From the Inside
Tear off a small piece of Blue Tack putty. I used about one-third of a stick for each side of the hole.
Roll the putty into a ball and flatten it into a small, thick disc. Press it firmly over the drainage hole on the inside of the pot.

Step 3: Seal the Outside of the Pot
Turn the flowerpot upside down and prepare another flattened disc of putty.
Press it over the drainage hole on the bottom of the pot. Smooth and press the putty firmly around the edges so the opening is sealed from both sides.
I seal both the inside and outside because I have had better results with a thicker plug.

Step 4: Let the Seal Rest
Allow the olla to sit for about 24 hours before filling it with water.
I do not like to rush this part. Giving the putty time to settle helps prevent the seal from shifting when the pot is filled.
Before burying it in the garden, fill the pot with water and set it somewhere you can watch it for a few minutes. The terra cotta will naturally become damp, but water should not run freely from the drainage hole.
Step 5: Use Your Olla in the Garden
Choose a location about 6 to 12 inches from the plant or group of plants you want to water. Keep in mind that a small 6-inch pot has a limited reach, so it works best beside one thirsty plant or a small grouping.
Dig a hole deep enough to bury most of the flowerpot. Leave the rim about 1 inch above the soil so loose dirt and mulch do not fall inside.
I usually place the saucer over the opening while filling the hole back in. This keeps soil from dropping into the pot while I work.
Carefully pack soil around the sides of the olla so there are no large air pockets between the pot and the ground. Good contact between the terra cotta and the surrounding soil helps the water move where it is needed.
Fill the olla with water and cover it with the saucer.

The lid slows evaporation and helps prevent bees, insects, leaves, and other debris from falling into the water. A covered opening also helps keep mosquitoes from using the standing water.
Check the olla regularly at first. How often it needs refilling will depend on the weather, soil, size of the pot, and the plants growing around it. A small olla may need water more often during a hot Texas summer.
How Does an Olla Watering System Work?
The idea is quite simple. The buried pot holds water below the surface of the garden, close to the plant roots.
Because unglazed terra cotta is porous, moisture can slowly move through the walls of the flowerpot and into the surrounding soil. As the soil dries, it draws out more water. When the soil remains moist, the water leaves the pot more slowly.

The roots may eventually grow toward the steady moisture around the olla. This helps keep water near the root zone instead of spreading it over the leaves or losing it across the top of the soil.

An olla does not water an unlimited area. A larger pot holds more water and may reach more plants, while a small pot is better suited to one plant or a tight group. Soil also makes a difference. Water may spread differently through sandy soil than it does through heavy clay.

Expert Tips
These are a few things I have learned from using clay pots for watering plants.
- Use only unglazed terra cotta. Paint, glaze, or a waterproof coating will prevent water from moving through the clay.
- Test the drainage-hole seal before burying the pot. The sides should become damp, but water should not pour from the bottom.
- Keep the lid in place. It reduces evaporation and keeps animals, insects, and garden debris out.
- Water new plants normally at first. Young roots may not reach the damp soil around the olla immediately.
- Check small ollas often during hot weather. A 6-inch pot does not hold as much water as a traditional large olla.
- Mark the location. Terra cotta can crack if it is struck with a shovel or garden fork.
- Remove it before a hard freeze. Water left inside a terra cotta pot can freeze, expand, and crack the clay.
Other Ways to Conserve Water in the Garden
An olla is helpful, but I still use it along with good watering and mulching habits. No single garden trick replaces paying attention to the soil and the plants.
Encourage Deep Roots
Water deeply rather than giving plants a quick sprinkle every day. A slower, deeper watering encourages roots to grow farther into the soil, where moisture does not evaporate as quickly. The exact schedule will depend on your soil and weather, so check below the surface before watering again.
Add a Thick Layer of Mulch
Mulch helps shade the soil, reduce evaporation, and slow weed growth. Weeds compete with garden plants for moisture, so keeping them under control matters during dry weather.
Cardboard can be placed beneath some types of mulch to help block weeds, as long as it is kept a little distance away from plant stems.
Water at the Base of the Plants
Aim water at the soil rather than the leaves. This puts moisture where the roots can use it and helps keep the foliage dry.
Early morning is usually the best time for regular garden watering because temperatures are cooler and wet leaves can dry during the day. If evening is the only practical time, water directly at the base and try not to leave the foliage wet overnight.
Use Buried Watering Containers
Ollas are not the only containers that can direct water below the surface. Some gardeners use buckets or large bottles with carefully placed holes.
I prefer the terra cotta olla because it releases the water gradually through the sides without needing several holes drilled into the container.
Homemade Olla Variations
The same basic idea can be adjusted for different garden spaces.
- Use a smaller terra cotta pot in a large container or raised planter.
- Choose an 8-inch or larger pot for bigger garden plants, keeping in mind that it will need a larger hole.
- Place several small ollas through a long vegetable bed rather than expecting one pot to water the entire area.
- Use a flat stone or another fitted lid if you do not have a matching terra cotta saucer.
I would not use a glazed or painted flowerpot for this project. Even if it looks pretty, the coating can keep the water from passing properly through the clay.
Frequently Asked Questions
Check it every day or two when you first install it. Once you see how quickly your plants and soil use the water, you can settle into a more regular schedule. Hot weather, sandy soil, large plants, and small ollas will usually mean more frequent refilling.
An olla generally releases water more slowly when the surrounding soil is moist. However, it should still be used with good judgment. Very wet soil, poor drainage, or a pot with a leaking bottom seal can still cause problems. Check the soil and make sure water is not escaping rapidly through the drainage hole.
Ollas are especially useful near thirsty garden plants such as tomatoes, peppers, squash, and melons. Herbs, flowers, and other plants can also benefit as long as their roots are close enough to reach the moist area.
I remove mine if freezing temperatures are expected. Terra cotta absorbs water, and freezing water can expand and crack the pot. Empty the olla, allow it to dry, and store it somewhere protected until the danger of a hard freeze has passed.
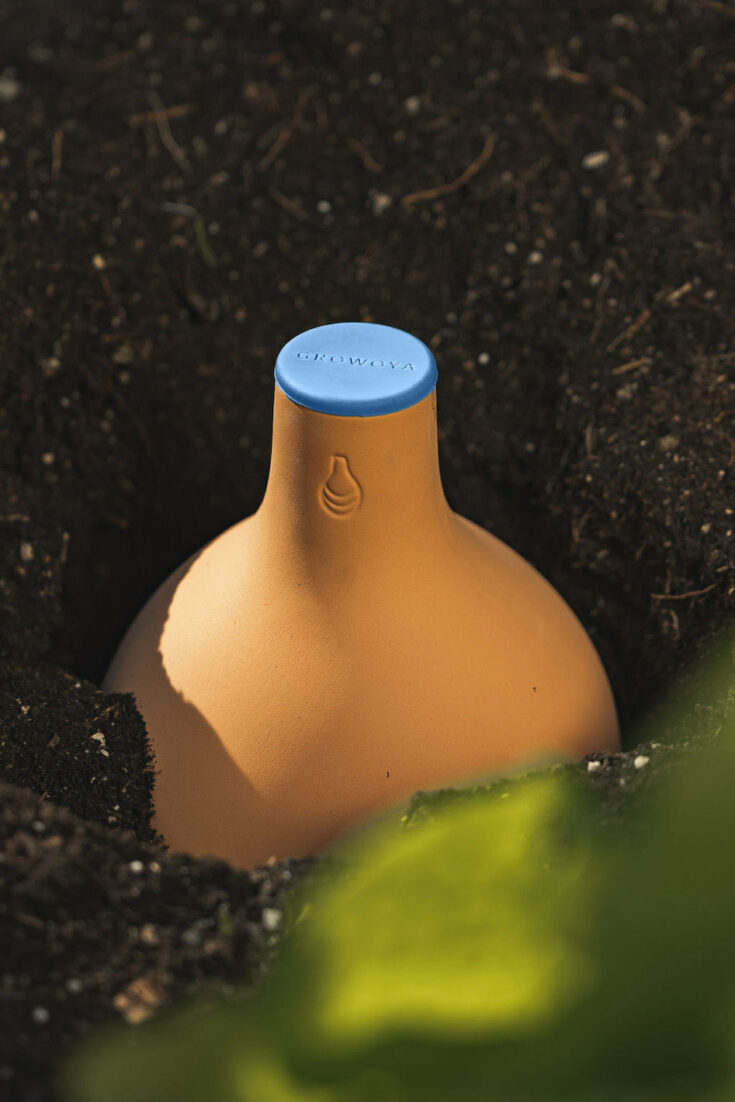
Can you buy an olla watering pot?
Purchased Ollas are a little pricy but you may wish to go this route instead of making one. They are indeed gorgeous almost too pretty to bury Terracotta Pots for Outdoor Automatic Plant Flower Beds, Planters – Self Globes for Constant Water Supply This piece is made out of Terra Cotta clay and fired in a kiln. It is approximately 14 1/2" tall and 3" round. This Olla comes with a Terra Cotta lid as well. Made from an unique and porous clay formula, the Oya™ Watering Pot saves garden watering by up to 70%. 1 plump- for large plants or vegetable gardens in 12"+ pots...Capacity: 500ml approx. 1 Chubby- for vegetable gardens in pots of 18 inches and more...Capacity: 1 liter approx. 1 Flesh- for vegetable gardens in pots of 24 inches and more...Capacity: 2 liters approx.Where to Purchase an Olla

More Ways to Care for Your Garden
If you are working on your garden this season, you may also enjoy my tips for How to attract Bees to your Garden, my Guide to Composting, the Free Garden Planner Printable and Gardening Tips, and my list of Essential Tools used in the Garden. Each one covers another practical way we care for the gardens around the ranch.
This little DIY olla has been a simple addition to our summer watering routine. It does not replace watching the weather and checking the soil, but it helps us put water near the roots without wasting as much across the surface.
If you make one for your garden, I would love to hear how you use it and which plants you place around it. Leave me a comment below, share your olla on Facebook and tag me, or leave a star rating on the project card. It helps more gardening friends find this project too.
🪴 Printable Tutorial
Tools
- parchment paper or wax paper to cover your working surface
Supplies
- Unglazed Terra Cotta Pot we used a 6 inch wide pot
- Terra Cotta Pot Saucer for lid
- Blue Tack Putty
Instructions
- Cover your work service with a sheet of parchment paper
- Remove all stickers and/or price tags from your clay pot
- Tear off a small piece of the blue tack (I used a third of one stick) and roll into a ball. Flatten the ball to form a flat round disc of the Blue Tack putty.
- Place the putty over the hole on the inside of the pot and press into place making sure it sticks and completely covers the hole. Smooth the edges with your finger to seal completely.
- Flip your clay pot upside down and tear off another piece of the putty. Form a ball from the putty and press into a flat disc. Place of the hole of the pot and press all around to seal the hole.
- Allow your DIY ollas to sit for about 24 hours before using them in your garden.
Notes
Click HERE to save these directions for a DIY clay pots for watering plants to Pinterest