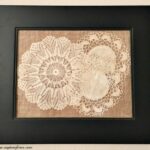
Framed Doily Art Tutorial
Decorate your Farmhouse with vintage doilies with this framed doily art. This easy doily wall art project is inexpensive and so easy to make
Servings 1 Piece
Cost $10
Equipment
- Fabric scissors
- Iron and pressing cloth, *optional
- Glass cleaner
- Soft lint-free cloth
Ingredients
Instructions
- Place the picture frame face down on a clean work surface and remove the backing.
- Clean both sides of the glass and dry it with a lint-free cloth.
- Use the frame glass or backing as a guide and cut the burlap or fabric slightly larger than the frame opening.
- Press the fabric and doilies on low heat if needed. Use a pressing cloth to protect delicate crochet.
- Place the doilies face down against the inside of the glass.
- Arrange the doilies until the spacing looks balanced, leaving a little open area around each one.
- Carefully lay the fabric over the backs of the doilies without shifting the arrangement.
- Replace the frame backing and secure it firmly.
- Turn the frame over and check the placement. Open the frame and adjust the doilies if necessary.
- Hang or display the finished framed doily art away from direct sunlight.
Notes
- Do not glue heirloom or antique doilies to the fabric. The pressure from a snug frame backing should hold them in place.
- If the contents move inside the frame, place a thin piece of cardboard behind the fabric before replacing the backing.
- A plain fabric background makes the crochet details easier to see.
Keep older textiles away from direct sunlight and damp areas. - The fabric edges do not need to be hemmed because they will be hidden inside the frame.