
Inexpensive DIY Mason Jar Solar Lights
These DIY mason jar solar lights came from a simple problem I needed to solve around the Ranch. I wanted a soft light for our outdoor tables that would turn on by itself, stay put during our Texas winds, and not require me to light candles every evening.
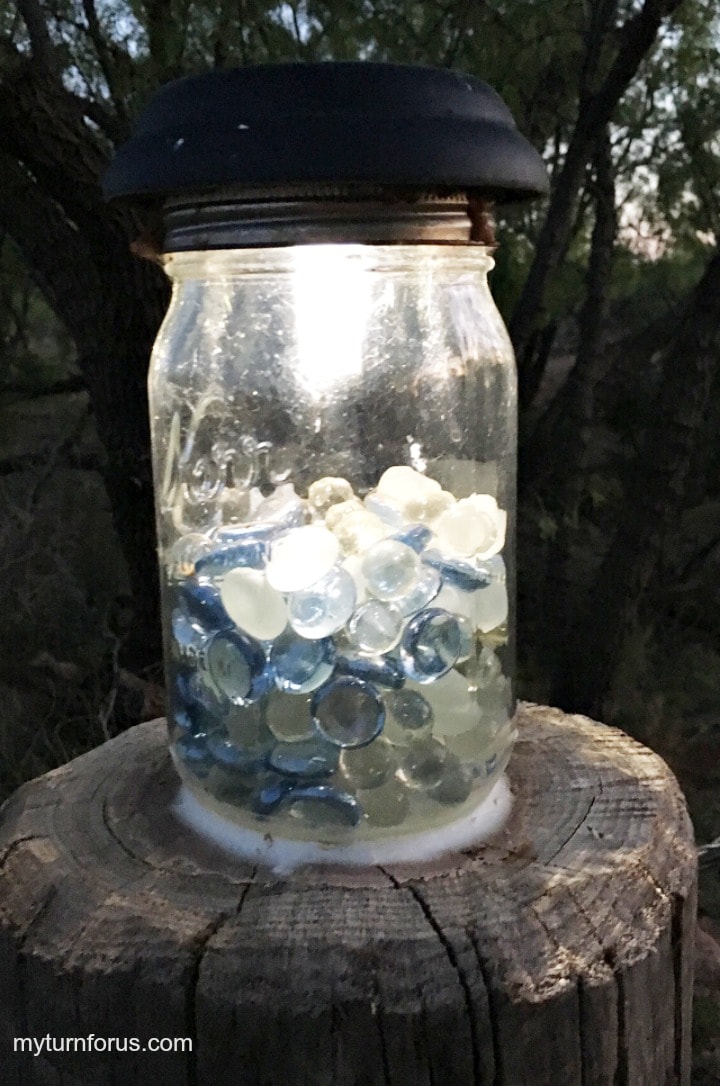
A few glass gems, an old solar yard light, and a mason jar turned out to be just what I needed. The finished lights give off a gentle glow, and the glass gems catch and reflect the light beautifully.
Why I Love These Mason Jar Solar Lights
This is the kind of project I enjoy because it is useful, inexpensive, and still looks pretty around the yard.
This post contains affiliate links, which means if you make a purchase, we might receive a small commission at no additional cost to you. Please read our Disclosure Policy.
- They turn on automatically when it gets dark.
- The glass gems add weight so the jars stay in place.
- No candles or electrical cords are needed.
- They reuse solar lights that might otherwise be thrown away.
- The light reflects through the glass gems and gives the jar a soft glow.
- You can place them on tables, steps, patios, or around the garden.
How This Idea Came About
My hubby and I have several tables set around the yard where we like to sit with coffee or another beverage at the end of the day. We enjoy the cooler evening air and listening to everything settle down around us.
I had been looking for a light that was heavy enough not to blow away during our spring winds but simple enough that I would not need to light it or bring it inside every night.
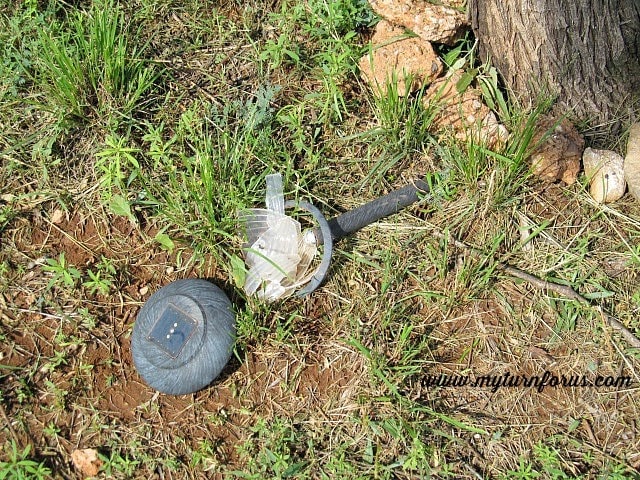
The answer finally came after one of the solar lights near our front gate was damaged by falling debris during a windstorm. The base was ruined, but the solar light on top still worked.
That reminded me of the mason jar lights my sweet friend Angie had made. She lives just down the road—which around here means about eight miles—and had reused the tops from damaged solar lights to make the prettiest hanging lights for her flower beds.
I saved my solar light top, gathered a few supplies, and made my own version for our outdoor tables.
Supplies I Use and Why
The complete supply list is in the how-to card below, but these are the main pieces that make the project work.
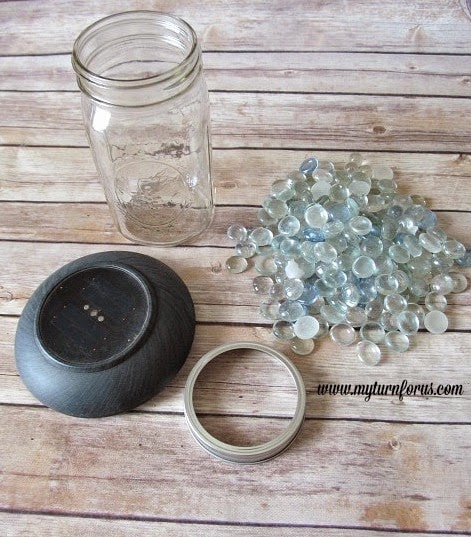
Top of a solar yard light: I reused the working top from a damaged solar pathway light. The solar panel, light, and battery compartment need to remain together and in working condition. Before gluing anything, place the light in direct sunlight for several hours and check it after dark. There is no reason to build the jar around a solar light that no longer charges.
Wide Mouth Mason Jar (or any size mason jar that the ring will fit your solar light): A wide-mouth jar works well because many solar light tops are close to the same size as the jar opening. The metal ring also gives you a sturdy piece to attach to the bottom of the solar light. Check the fit before adding glue because solar light tops are not all made the same size.
Glass gems (for weight): I use about 2 cups of glass gems in a quart-size jar. They add enough weight to help keep the light from tipping over, and they reflect the light without filling the entire jar. I only fill the jar about halfway. Filling it to the top would make the jar unnecessarily heavy and block some of the light.
Weather-resistant adhesive: The adhesive needs to bond the mason jar ring to the plastic housing of the solar light. I used Gorilla Glue, but any strong outdoor adhesive made for both metal and plastic should work. Be careful not to let the glue spread into the battery compartment, switch, solar panel, or threaded area of the jar ring.
Tools:
- Clean cloth
- Small file, optional
- Work gloves, optional
- measuring cup
How to Make Mason Jar Solar Lights
The printable how-to card is below, but I’ll walk you through the project first so you can see how everything fits together.
Step 1: Test and take apart the solar light
Unscrew the solar light from its globe and ground stake. You only need the working top section that contains the solar panel, bulb, and battery compartment.
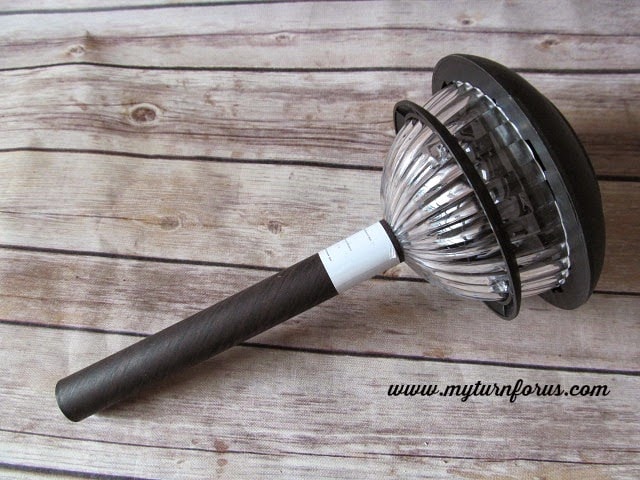
Remove the battery cover and rechargeable battery before gluing. This protects the battery and keeps the compartment accessible while you position the mason jar ring.
Clean any dirt from the bottom of the solar light and allow it to dry completely. Adhesive holds better on a clean, dry surface.
Step 2: Add the glass gems
Pour the glass gems into the mason jar until it is about halfway full. I use approximately 2 cups for a quart-size wide-mouth jar.
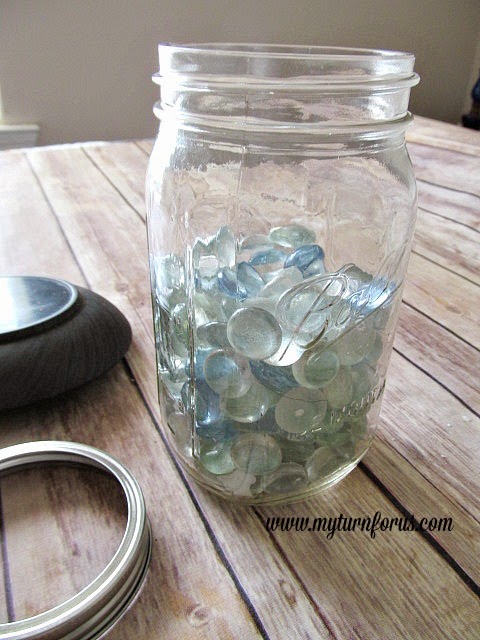
The gems make the jar heavy enough to stay on the table during an ordinary breeze. They also catch the light and create that pretty glow inside the jar.
Step 3: Position the mason jar ring
Turn the solar light upside down and center the mason jar ring on the bottom.
Before adding glue, check that the ring does not cover the battery compartment, on-and-off switch, or any openings needed to service the light later.
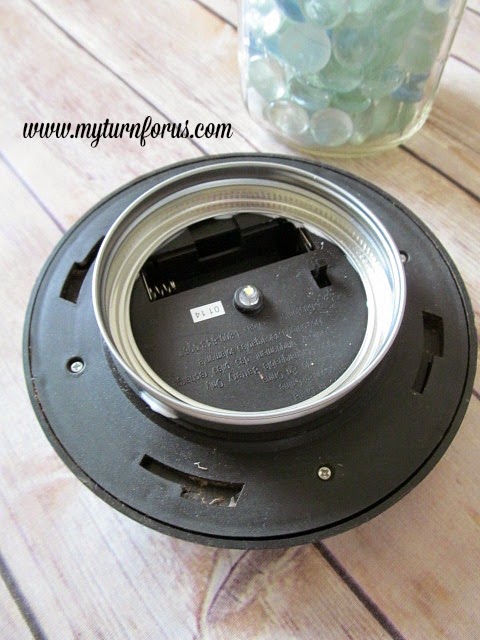
This is one of those little steps that matters. You may not need to replace the rechargeable battery for quite some time, but you will be glad you left yourself a way to reach it when the day comes.
Step 4: Glue the ring in place
Apply a small amount of weather-resistant adhesive where the mason jar ring touches the bottom of the solar light.
Press the ring into place and check that it is centered. Wipe away any adhesive that squeezes toward the battery opening or inside the threaded portion of the ring.
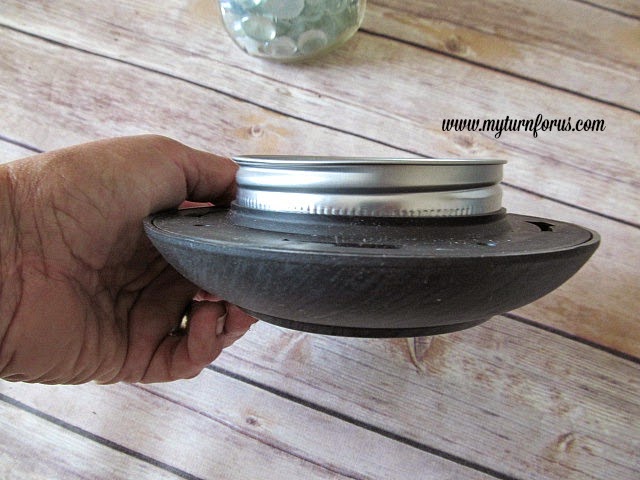
Let the adhesive cure for the full amount of time listed on the package. I prefer to leave it undisturbed overnight, or longer when the adhesive calls for it. Rushing this part can cause the ring to pull loose when you twist the light onto the jar.
Step 5: Replace the battery and cover
Once the adhesive has fully cured, reinstall the rechargeable battery and its cover.
Depending on the shape of your solar light, the corners of the battery cover may touch the rim of the jar. If that happens, you may be able to carefully file the corners just enough to improve the fit.
Do not damage the battery compartment or electrical components. If the pieces do not fit safely, use a different solar light top or jar rather than forcing them together.
Step 6: Attach the solar light to the jar
Screw the finished solar light top onto the mason jar just as you would attach a regular jar lid.
Do not overtighten it. It only needs to be secure enough to remain in place.
Set the jar outside where the solar panel will receive several hours of direct sunlight. The light should turn on automatically after dark.
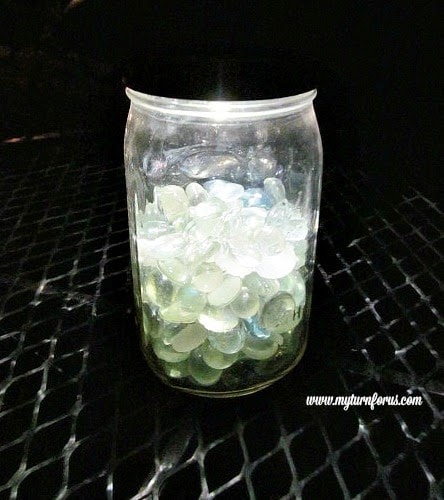
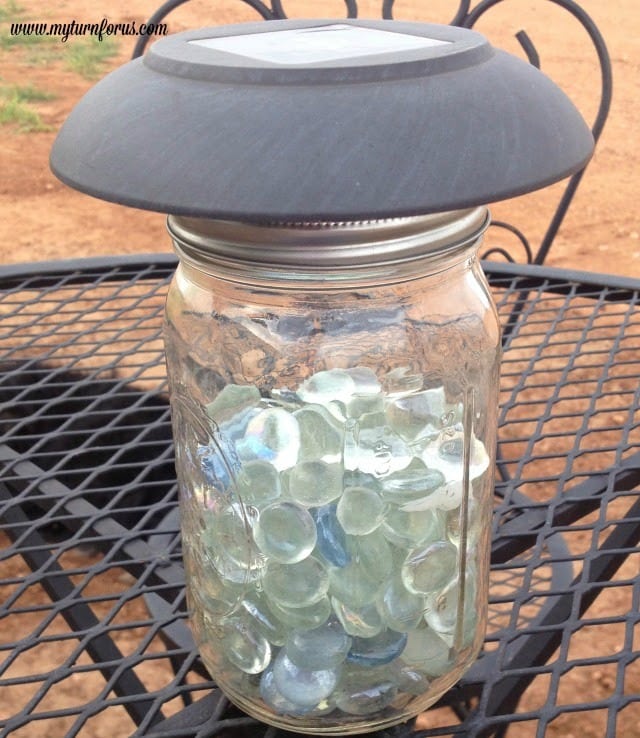
See how gorgeous these lights are with the gems reflecting the light. They are sitting around on tables and on the BBQ Pit around the Ranch yard. I just love them and the price was even better. We also made these super easy DIY Mason Jar Bird Feeders. Now I know you wish to see the object of my inspiration! My friend Angie’s lights!
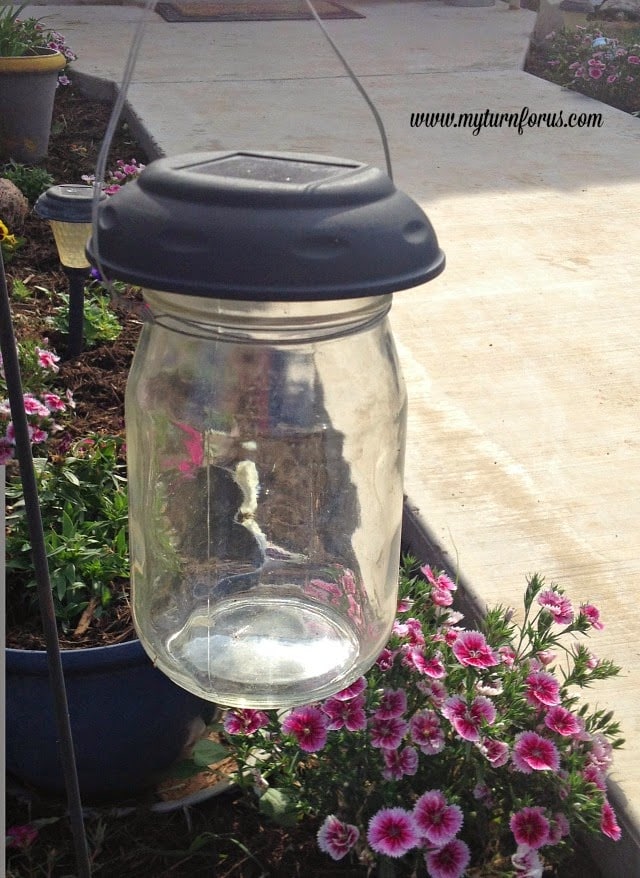
She used wire and made little hangers-on each jar and they are hanging in her flower beds bordering the sidewalk. They are just gorgeous!
Expert Tips
These are simple to put together, but a few small details will help them hold up better outdoors.
- Test each solar light before gluing it to a ring.
- Dry-fit the jar, ring, and light top before applying adhesive.
- Keep the solar panel completely uncovered.
- Leave access to the battery compartment whenever possible.
- Use enough gems to steady the jar without filling it completely.
- Allow the adhesive to cure fully before screwing the top onto the jar.
- Place the lights where the solar panels receive direct sunlight during the day.
- Bring the jars into a protected area during severe storms, hail, or freezing weather.
- Wipe dust and pollen from the solar panel when the light begins to look dim.
My most important tip: Do not glue over the battery compartment. Rechargeable solar batteries last a long time, but they do not last forever.
Ways to Change the Look
You can make these solar lights fit your porch, patio, or garden without changing the basic method.
- Use clear, blue, green, or amber glass gems.
- Add a piece of jute or ribbon around the neck of the jar.
- Use smaller mason jars if your solar light top fits the ring securely.
- Wrap sturdy wire around the jar neck to create a hanger like Angie did for her flower beds.
- Frost the outside of the jar with glass-safe spray for a softer, more diffused light.
When adding ribbon, wire, or other decorations, keep them away from the solar panel and light sensor.
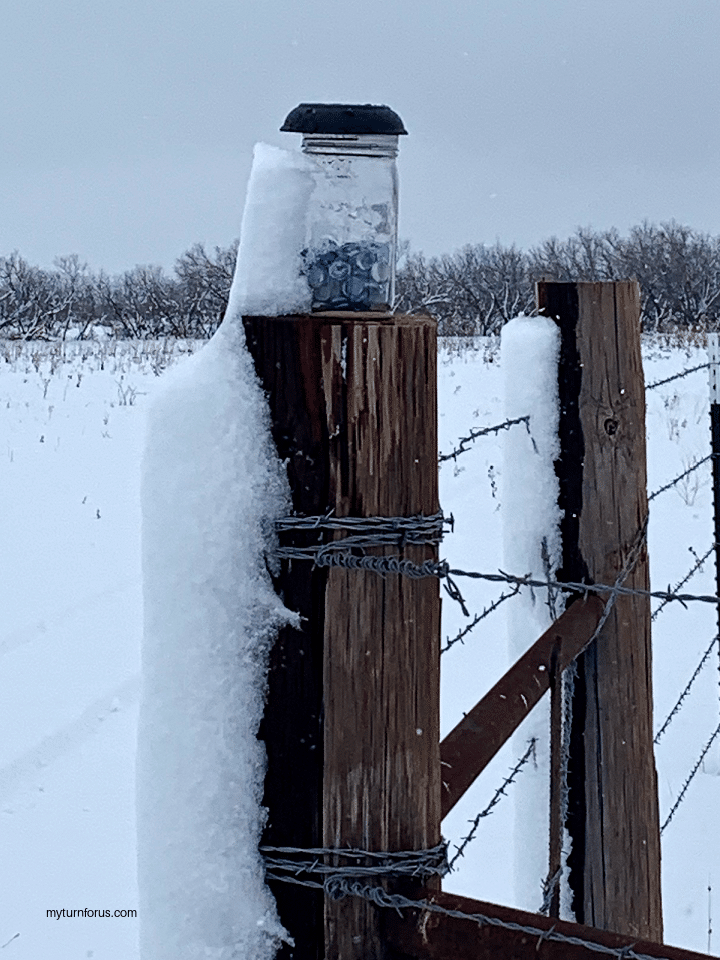
Even in the cold Texas snow, our Mason Jar Solar Lights keep shining!
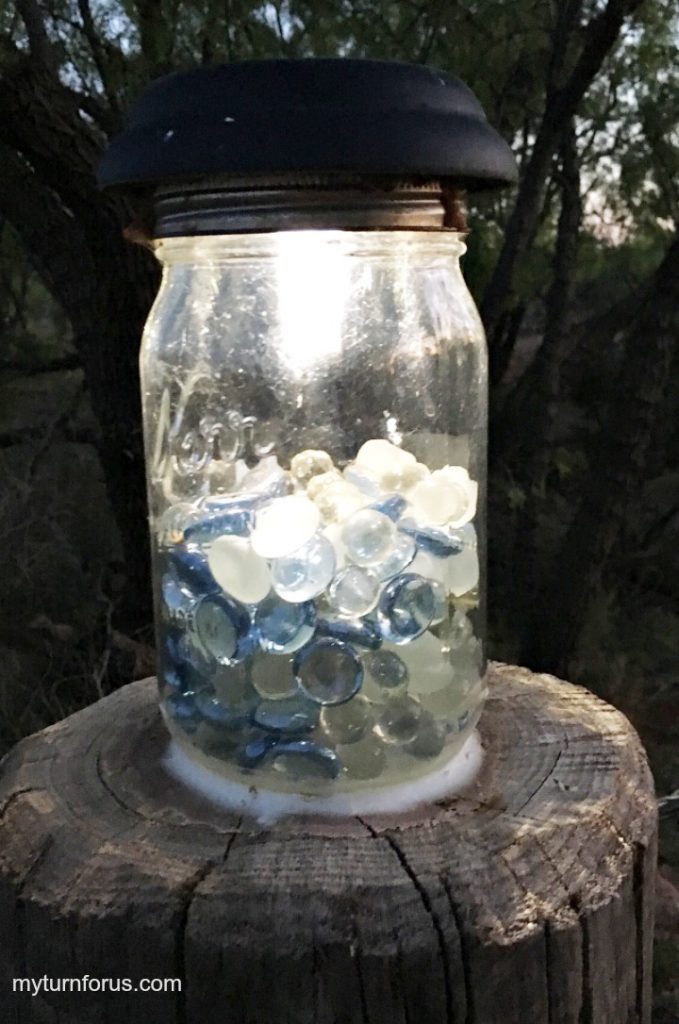
Look at this beauty perched on our fence post after a snowy surprise! These simple DIY solar lights prove they’re tougher than they look, delivering that soft, romantic glow even when winter tries to tuck them in under a blanket of white. We placed this one on the fence post for a practical test, and it didn’t disappoint. It charged during the day (even with overcast skies and snow) and lit up softly that night, adding cozy charm to the wintry ranch scene.
Here’s why they keep working beautifully even in cold, snowy conditions:
- Cold actually helps the solar panel. Solar cells often perform better in cooler temperatures. The panel doesn’t need warmth — it just needs light from sunlight (direct or diffused). Snow on the ground can even act like a natural reflector, bouncing extra light toward the panel.
- Snow doesn’t stop them for long. A light dusting or partial coverage still lets some light through. The panel warms slightly from absorbed energy, helping snow melt or slide off. In our Texas winters, it rarely stays buried long enough to fully block charging.
- The battery holds up. These lights use standard rechargeable AA batteries (easy to replace if needed, though ours have lasted years without swapping). While extreme cold can reduce battery efficiency a bit, our simple design and the shorter but still effective charging windows keep them going strong for evening glow.
- Built for ranch life. The sealed mason jar and glued ring protect the internals from moisture, and the weighted base keeps them steady against wind. We’ve had them out through all kinds of Texas weather, including those surprise cold snaps and snowfalls.
Frequently Asked Questions
You can use many styles, but the top must fit over the mason jar opening and still allow the jar ring to attach securely. I recommend taking the jar ring with you when shopping so you can compare the sizes.
Most solar yard lights use a rechargeable battery that is charged by the solar panel during the day. If the light stops holding a charge, replace it with the same type and voltage of rechargeable battery recommended by the light manufacturer. Do not replace it with a standard disposable battery unless the manufacturer says it is safe to do so.
Solar yard lights are made for outdoor use, but the completed mason jar light may not be fully waterproof around the glued seam or jar opening. I leave mine outdoors in normal weather but move them to a covered area when severe storms are expected.
Make sure the switch is turned on and that any protective tab has been removed from the battery compartment. Place the light in direct sunlight for a full day, then test it in complete darkness. You may need to cover the solar panel with your hand to trigger the light sensor.
The time will depend on the solar light, the age of its battery, and how much direct sunlight it receives. A shaded solar panel may only provide a short glow, while a fully charged light can stay on for several hours.
More Mason Jar and Backyard Projects to Try
These little lights look lovely sitting on our outdoor tables and around the BBQ pit. If you enjoy making useful projects for the yard, you might also like my Mason Jar Bird Feeder or these Backyard Projects and Garden Ideas and even my Farmhouse Porch Decor. For more ways to use jars around the house, take a look at my Mason Jar Luminaries and Christmas Centerpieces with Mason Jar.
Angie added wire hangers to her jars and hung them throughout the flower beds bordering her sidewalk. They look especially pretty after dark, and I love that the idea began with damaged solar lights that still had plenty of life left in them.
These DIY mason jar solar lights have given us the soft outdoor lighting I wanted without cords, flames, or much fuss. Around here, I like things that work and still look nice, and these little lights do both.
If you make your own mason jar solar lights, I would love to hear where you place them. Leave a comment below, share a photo and tag me on Facebook, and please leave a rating on the how-to card. It helps more friends find this project and make one for their own yard.
🏡 Printable Project Card

Tools
- Clean cloth
- Small file, optional
- Work gloves, optional
Supplies
- 1 Top of a Yard solar Light
- 1 wide mouth Mason Jar
- 2 cups glass gems
- 1 Gorilla Glue
Instructions
- Test the solar light.
- Place the solar light in direct sunlight for several hours and check that it turns on after dark.
- Remove the solar light top.
- Unscrew the solar light from its globe and ground stake. Keep the top section containing the solar panel, bulb, and battery compartment.
- Remove the battery.
- Open the battery compartment and remove the rechargeable battery while you work.
- Clean the light.
- Wipe dirt from the bottom of the solar light and allow it to dry completely.
- Fill the mason jar.
- Pour approximately 2 cups of glass gems into the jar, filling it about halfway.
- Check the fit.
- Center the mason jar ring on the bottom of the solar light. Make sure it does not block the battery compartment, switch, or jar threads.
- Glue the ring in place.
- Apply a small amount of weather-resistant adhesive where the metal ring touches the solar light housing. Press the ring into place and wipe away excess glue.
- Let the adhesive cure.
- Leave the solar light and ring undisturbed for the full curing time listed on the adhesive package.
- Replace the battery.
- Reinstall the rechargeable battery and battery cover. If the cover barely touches the jar rim, carefully file only the interfering corners. Do not damage the battery compartment.
- Attach the light to the jar.
- Screw the solar light top and attached ring onto the mason jar. Tighten it gently without forcing it.
- Charge the light.
- Place the finished mason jar light outdoors where the solar panel will receive direct sunlight. It should turn on automatically after dark.
Notes
- Test all parts together before applying glue.
- Keep adhesive away from the battery compartment, switch, solar panel, light sensor, and jar threads.
- Use the same type and voltage of rechargeable battery recommended by the solar light manufacturer.
- Do not use a standard disposable battery unless the manufacturer specifically allows it.
- Clean the solar panel occasionally to remove dust and pollen.
- Move the jar to a sheltered area during severe storms, hail, or freezing weather.
- Outdoor adhesives have different curing times. Follow the directions on the product you use rather than relying only on the estimated project time.
Click HERE to save these Mason Jar Lights to Pinterest

I love this, Evelyn ! We need all sorts of stuff with the loadshedding and this would be very helpful {and much cheaper!}
What a neat idea!! This would be so fun in our backyard makeover! 😉
Two questions
1. Why does a solar light need batteries? Isn't that defeating the purpose?
2. What did you do with the rest of the solar light that you bought?
Thank you for your interest!
1. A solar light would only work when the sun was shinning if it did not have a means to store the power. By using a battery, the sun recharges the battery during the day and then the battery powers the light at night. And repeats itself every day and night. I have had some of my solar lights over a year and have never had to change the batteries, they are still recharging themselves every day.
2. I haven't done anything with the bottom of the light YET:)) Would love to have some ideas!
Beautiful Everyone, simply beautiful. I'm wondering…. My local "dollar store" sell the solar lights. (they are smaller, and I have never tried them) do you think they would work with this project?
I'm helping plan my daughters wedding and they would be a beautiful path down the aisle of a night wedding. TIA
Evelyn these are enchanting. I have a question for you…. My local "dollar store" sells a smaller version of the lights. (I have never tried them) do you think they would work with this project? The cap is smaller and might need some embellishing I imagine.
I'm helping my daughter plan her wedding and they would make a beautiful path down the aisle.
Evelyn these are enchanting. I have a question for you…. My local "dollar store" sells a smaller version of the lights. (I have never tried them) do you think they would work with this project? The cap is smaller and might need some embellishing I imagine.
I'm helping my daughter plan her wedding and they would make a beautiful path down the aisle.