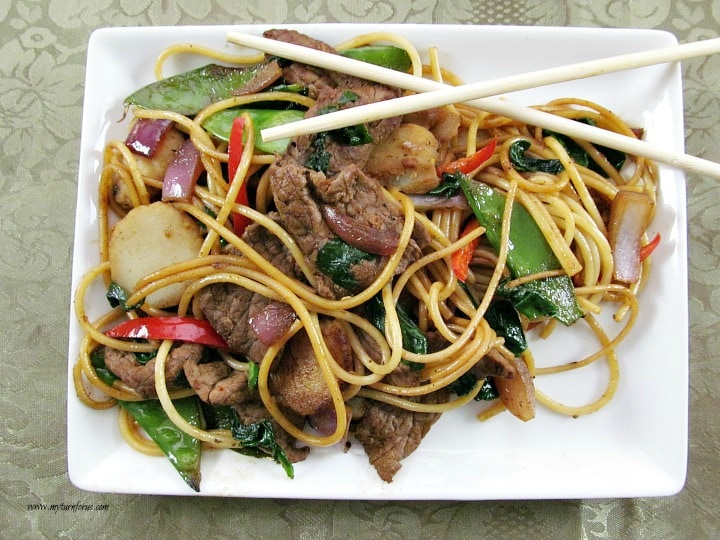
Asian Beef Lo Mein
No need to pick up takeout tonight, friends! This Quick and Easy Beef Lo Mein comes together in about 30 minutes right in your own kitchen. Tender slices of beef, crisp stir-fry veggies, and noodles tossed in a flavorful sauce make this healthier version of the classic Chinese favorite a weeknight winner. Skip the long wait and high prices — dinner’s on the table fast, and it’s loaded with fresh ingredients your family will love!

This Quick and Easy Beef Lo Mein comes together in about 30 minutes and makes a delicious, healthier version of your favorite Asian beef and noodles. Loaded with crisp stir-fry vegetables, lean beef, and tender noodles, this is the kind of meal that satisfies without derailing your healthy eating goals. While restaurant stir-fries are packed with lean protein and fresh veggies, they can sneak in extra salt and sweetened sauces that add up fast.
This post contains affiliate links which means if you make a purchase we might receive a small commission at no additional cost to you.
How to have healthier Chinese Beef and Noodles
The good news is you can enjoy all the comforting flavors of your favorite Chinese beef and noodles without the extra salt, sugar, and mystery additives that often come with restaurant versions. By making it at home, you stay in control of the ingredients, choose lean beef, load it up with fresh vegetables, and keep the sauce lighter. With a few smart shortcuts and simple prep tips, you’ll have a healthier, tastier Beef Lo Mein on the table in about 30 minutes — no takeout wait or guilt required!

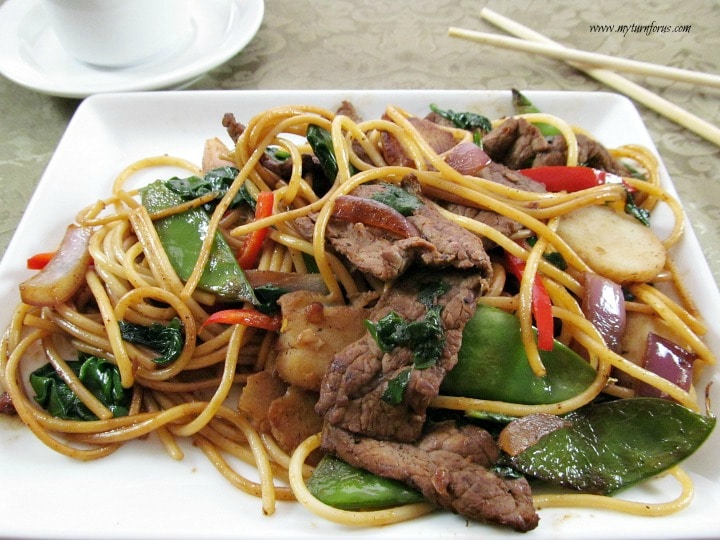
This Quick and Easy Beef Lo Mein is the perfect weeknight dinner solution. It’s fast, flavorful, family-approved, and on the table in about 30 minutes.
This recipe helps solve those common concerns about making a healthier beef and noodles stir-fry at home. It’s loaded with fresh, wholesome ingredients, and the best part? Most of the time is spent chopping the vegetables — and with a sharp knife, that only takes a few minutes.
Note: Use a large cutting board and chop all your veggies and leave them on the board. This prevents you from adding to the workload and to prevent all the extra dishes you will have to wash.
Asian Beef lo Mein Recipe:
Ingredients:
- ¼ cup hoisin sauce
- 2 Tablespoons soy sauce
- 1 Tablespoon water
- 2 garlic cloves, minced
- ¼ teaspoon crushed red pepper flakes
- 1 pound Beef Round Steak, thinly sliced
- 6 ounce noodles or spaghetti, uncooked
- 4 teaspoons vegetable oil
- 8 ounce can sliced water chestnuts
- 1 purple onion, sliced thick
- 1 cup snow peas
- 10 ounces fresh baby spinach
- 1 red chile, seeded and sliced
- sliced almonds, optional for garnish
- sliced green onions, optional for garnish
Equipment Needed:
- Large Cutting Board
- Sharp Knife
- Mixing Bowls
- Pot for cooking noodles
- Wok
🥣 Recipe Tips
- Make it even quicker on busy nights: Prep all your vegetables and slice the beef the night before or in the morning. Store them in the fridge so when you get home, you can have dinner ready in under 20 minutes.
- Customize to your family’s taste: This recipe is very flexible. Add broccoli, bell peppers, carrots, or mushrooms for extra veggies. For a little more heat, leave the seeds in the red chile or sprinkle in extra red pepper flakes. You can also swap the beef for chicken or shrimp.
- Leftovers tip: This Beef Lo Mein reheats beautifully. Store in an airtight container in the fridge for up to 3 days. When reheating, add a splash of water or a little extra soy sauce to loosen the noodles and bring back that fresh stir-fried texture.
How to make a healthier Beef lo Mein:
Directions:
- In a small bowl, whisk together the first five ingredients to make the marinade. Remove ¼ cup of the marinade and place it in a large bowl. Add the sliced beef and toss to coat well. Let it marinate for 10 minutes.
- Cook the spaghetti according to package directions. Drain and set aside.
- Heat the vegetable oil in a large skillet or wok over medium-high heat. Add the marinated beef (in two batches if needed) and stir-fry until no longer pink, about 2–3 minutes. Remove the beef to a plate and cover to keep warm.
- In the same skillet, add a little more oil if needed and stir-fry the water chestnuts, purple onion, and snow peas for 1–2 minutes until crisp-tender. Add the spinach and the remaining marinade mixture, tossing to coat. Stir-fry until the spinach wilts.
- Return the beef to the skillet, add the drained spaghetti and sliced red chile. Toss everything together and cook until heated through.
- Serve hot, garnished with sliced green onions and/or sliced almonds, if desired.
There you have it — a quick, healthy, and incredibly satisfying Beef Lo Mein that’s better than takeout and on the table in about 30 minutes. No long lines, no mystery ingredients, and no guilt… just delicious homemade flavor your whole family will ask for again and again.
Give this Asian Beef recipe a try tonight and let me know how it turns out! I’d love to hear what vegetables you added or any fun twists you made in the comments below. Happy cooking, friends!
Other Healthier Recipes:
🥣 Recipe
Equipment
- Cutting Board Large
Ingredients
- ¼ cup hoisin sauce
- 2 Tablespoons soy sauce
- 1 Tablespoon water
- 2 teaspoon sesame oil
- 2 garlic cloves minced
- ¼ teaspoon crushed red pepper flakes
- 1 pound beef round steak thinly sliced
- 6 ounces whole wheat spaghetti uncooked
- 4 teaspoon vegetable oil
- 1 8 ounce can sliced water chestnuts
- 1 purple onion sliced thick
- 1 cup snow peas
- 10 ounces fresh baby spinach
- 1 red chile seeded and sliced
- sliced almonds for garnish optional
- sliced green onions for garnish optional
Instructions
- In a small bowl, whisk together the first five ingredients to make the marinade. Remove ¼ cup of the marinade and place it in a large bowl. Add the sliced beef and toss to coat well. Let it marinate for 10 minutes.
- Cook the spaghetti according to package directions. Drain and set aside.
- Heat the vegetable oil in a large skillet or wok over medium-high heat. Add the marinated beef (in two batches if needed) and stir-fry until no longer pink, about 2–3 minutes. Remove the beef to a plate and cover to keep warm.
- In the same skillet, add a little more oil if needed and stir-fry the water chestnuts, purple onion, and snow peas for 1–2 minutes until crisp-tender. Add the spinach and the remaining marinade mixture, tossing to coat. Stir-fry until the spinach wilts
- .Return the beef to the skillet, add the drained spaghetti and sliced red chile. Toss everything together and cook until heated through.
- Serve hot, garnished with sliced green onions and/or sliced almonds, if desired.
Notes
Nutrition
Click HERE to save these Asian Beef and Noodles to Pinterest